The Blended Power of UI and API Testing Tools
How do you test your UI and API? Our guest, Daniel M, presents an approach using Postman to test your UI and API.

Ever thought of amalgamating the power of UI and API testing tools for your project? Well, I recommend this approach to every Test Automation development team – they should always keep on hand both a UI test automation tool and an API test tool for just this purpose.
Some scenarios in which your team could combine the power of both API and UI test automation tools are as follows -
Case 1 - Use the API test tool for Pre-Set up before launching the UI tests.
Case 2 - Use the API and UI test tool in combination as per the output reports desired.
Your Automation team can use API testing specific tools such as Postman for the API tests. They can use UI testing tools for UI validation. Tools like the TestProject tool support both UI Testing and API testing with the same tool.
Let me show you the results of a pure API test and then the results of a pure UI test in the examples below. Following that , I will explain about the above two scenarios along with examples.
A pure API test example
Let us say we need to hit the wiki page and fetch the text from that page. First, to get the URL, click the following link, https://www.mediawiki.org/wiki/API:Main_page
The endpoint is mentioned as: https://en.wikipedia.org/w/api.php.
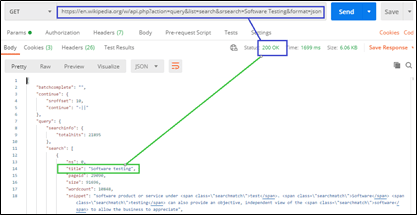
If we use the Postman API test tool, we can issue the GET request to the above endpoint URL as: https://en.wikipedia.org/w/api.php?action=query&list=search&srsearch=Software Testing&format=json
And, we get the response as below.
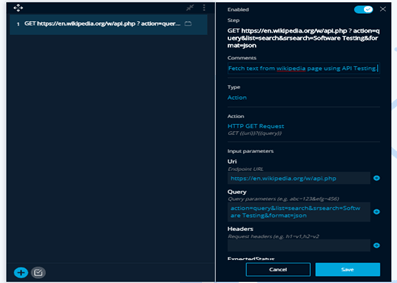
Let us now try it in the TestProject tool using the API test method by providing details per the following:
- Action: HTTP GET Request
- Endpoint URL:
https://en.wikipedia.org/w/api.php - Query parameters:
action=query&list=search&srsearch=Software Testing&format=json - JsonPath:
$.query.search[0].snippet
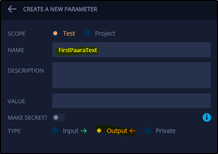
The test input details can be provided as above, and an output parameter can be created to store the output details.The query parameters indicate a JSON being desired as output. The index 0 in the JSON Path indicates that the 1st section(paragraph) of the page’s result is required to be fetched.
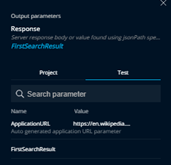
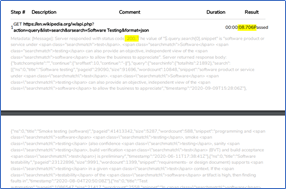
The output is displayed as follows when the API test completes; you can view the response body with the status code as 200. It also mentions Metadata: [Message]: Server responded with status code: 200. The value of "$.query.search[0].snippet" is "software product ….." which is the text we desired to verify.
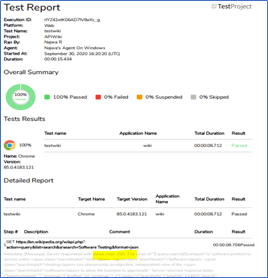
Next, If you are to run the equivalent test using a UI test, you will notice that the test has run faster than an equivalent GUI Test.
A pure UI test example
Let us try the same in the GUI test. Let us put the output stored into an output parameter. The URL we use is https://en.wikipedia.org/wiki/Software_testing.
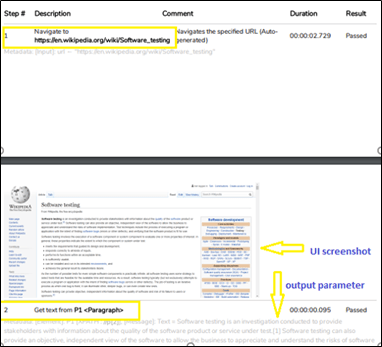
In the test, we navigate to the URL, and later get the text into the output parameter.
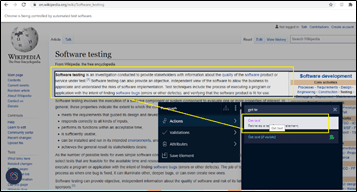
The resulting test looks like:

The test report output will show UI screenshots as per the UI tests completed.
Now, moving on to the two case scenarios that I mentioned about earlier -
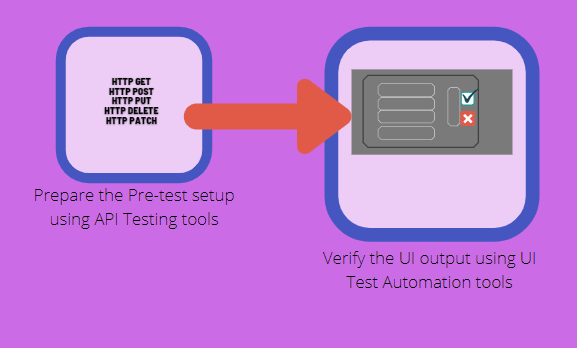
Case 1 - Use the API test tool for Pre-Set up before UI tests.
In this case, we can get the pre-setup ready for the UI tests in any of the following ways -
- Manually prepare the pre-set up, or
- By using a UI automation tool, prepare the pre-set up, or
- By utilizing an API testing tool, prepare the pre-set up.
This article talks about the above mentioned 3rd approach.That is, we use an API test tool to get the Pre-set up ready. Once that is ready, we proceed to run the UI validation sets based on that set-up.
A detailed example of a customer scenario is explained later in this article. The scenario covers the flow as follows,
Case 2 - Use the API and UI test tool in combination as per output reports desired.
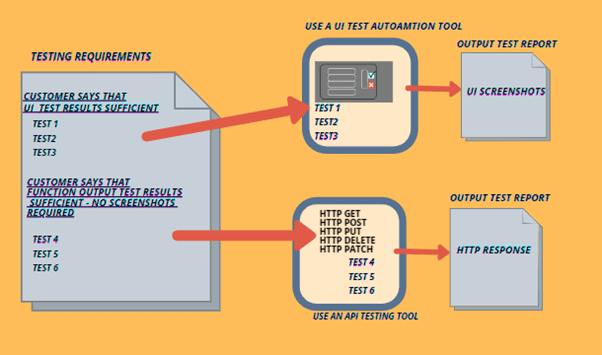
There are cases in which the customer requires a pure UI verification output. That is, they need screenshots of the UI action test outputs. In these cases, choose a useful UI test automation tool.
However, In cases where only the function output needs to be tested, you can choose to use the API testing tool. The API tests provide test results much faster than an equivalent GUI test.
Hence, for the same project, as per the requirement, you can segregate the tests accordingly as:
- List of tests when the customer indicates that UI test results are sufficient, and
- List of tests when the customer indicates that Function output test results are sufficient; no screenshots required.
A detailed example of a customer scenario is explained later in this article. The scenario covers the flow as follows,
Case 1 Example - Use the API test tool for Pre-Set up before UI tests.
The customer requires you to test their Messaging web application. In the application, emails are being sent from the sender to the receiver. The test requires you to test the following scenarios. To verify –
- contents of a successful New mail from the sender to the receiver. Verify the subject, message body of the mail.
- contents of a Replied mail. Verify the subject (Prefixed with Re:), the message body of the mail.
- Contents of a forwarded mail. Verify the subject (Prefixed with Fwd: ), the message body of the mail.
In the above cases, to check the output message body on the UI, before the UI tests are triggered, we need to get the set-up of mails ready. That is, we need:
- A new mail
- A received mail
- A forwarded mail
For these emails, the goal is to verify its contents using the UI test automation tool.We need to keep the following types of mails available in the UI as the pre-set up stage before we test the UI contents.
To get the pre-setup of mails ready, options are -
- Manually send/reply/forward emails by clicking on the mailbox UI to get the test set up mails ready.
OR -
- Use a UI automation tool to send/reply/forward emails by having the automated script clicking on the mailbox UI to get the test set up mails ready.
OR -
- Use an API Test tool to send/reply/forward mails by issuing HTTP requests to get the test set up mails ready.
In the 1st case, it will be time-consuming to manually prepare the pre-set up of mails.In the 2nd case, you could use a UI automation tool to perform the steps, which will be faster than doing it manually. In the 3rd case, you can use the API test tool for the pre-set up steps in a faster way using the API HTTP requests. If we follow the 3rd case, it leads to the approach of combining the power of API tools along with the UI automation tools. With this approach, using the API Test tools, the mails test set up can be made ready, after which the UI verification of the received mails can be done.
Hence, in the above scenario, we would do the following by combining the power of both the API and UI Test tools:
- Get the test set up ready to send/reply/forward mails using an API test tool - this approach is much faster. Remember though, that there will not be any screenshots during the process.
- Do the actual testing of the UI – content verification using a UI test automation tool. Here, screenshots are produced in the test results.
Case 2 Example - Use the API and UI test tool in combination as per output reports desired.
Consider the scenario in which the customer quotes:
1. You don't need to re-test the regression tests this time using a UI automation tool. It has been running stable for the past 100+ releases. Instead, please use an API test tool to produce the test results.
2. We have some new UI features coming in this release, so please use a UI automation tool as we need the screenshots of the newly launched UI
In this case, your team can use the API Test tool for producing test results for the set of stable tests. And, for testing the new features, because the customer also needs screenshots while the UI gets tested, the UI Automation tool can be used.
Conclusion
When a Test Automation team is given the responsibility to build a test automation framework for testing the product, I suggest that they thoroughly first understand the functionalities of the product. After that, they can choose to blend in the usage of an API test tool along with the UI test automation tool by segregating the tests as per the outputs desired by the customer. They should also check what the pre-setup scenarios are, where they can use the API test tools. The Automation Team can involve the Business Analysts and the Development team to make more informed decisions.
We already know that using the API test tool has the advantage of producing output results much faster than what a GUI test would perform. The UI test tools have the advantage in that they mimic the exact clicks and actions that a user would perform, and the test results would produce associated UI screenshots. Hence, keeping these two main advantages in hand, the automation team can inform the customer on this approach based on the appropriate scenarios by proposing the scenario flows.
Eventually, following this approach produces a more robust way of building the test automation framework. With the advantage of powerful test tools available on the market to help support this, I am sure the project can be a success for the Automation team and the customer.


